How to Boost Your Glutes with the Bench‑Supported Kickback
If you’ve been hunting for a single move that isolates the glutes without overloading the lower back, the bench‑supported kickback deserves a spot in your routine. It’s a simple, equipment‑light exercise that still delivers a deep burn, making it perfect for beginners and seasoned lifters alike. Below we’ll unpack why this variation works so well, walk through each phase of the lift, and share tweaks to keep the muscle firing at its peak.
What Is the Bench‑Supported Kickback?
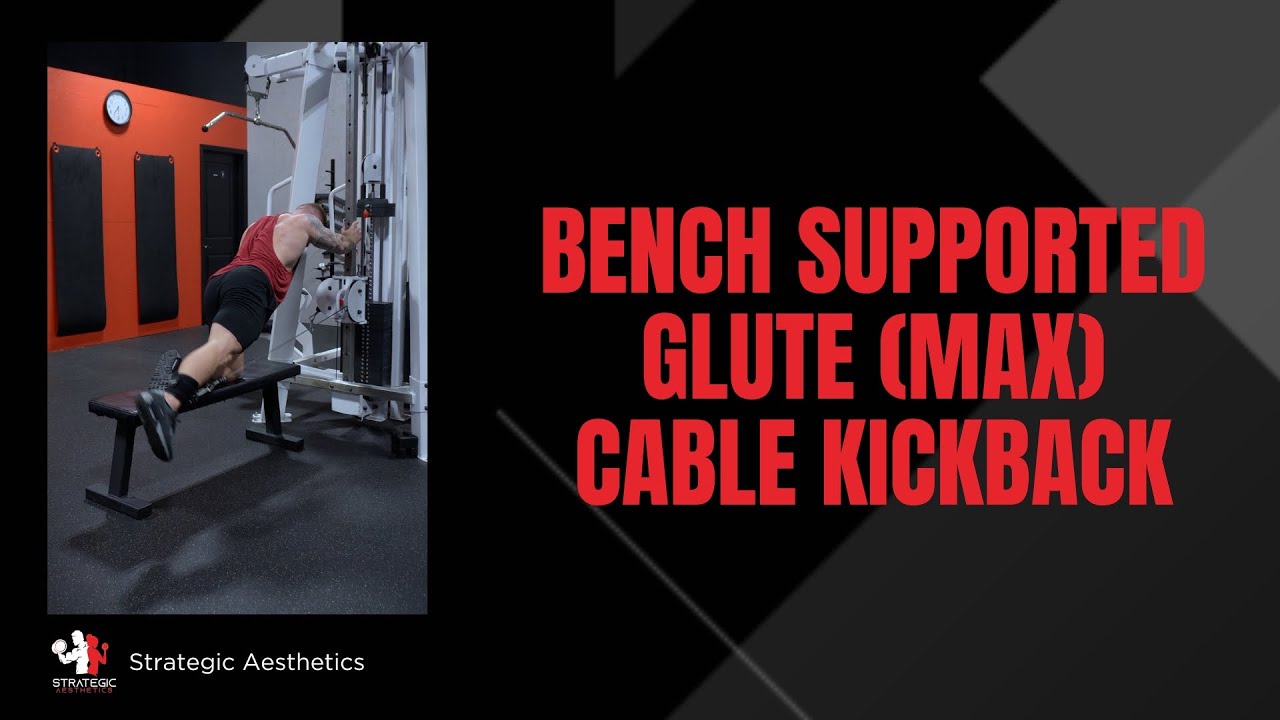
The bench‑supported kickback is essentially a hip‑extension performed while your torso rests on a sturdy bench. One leg stays planted on the floor, the other is lifted behind you, and you squeeze the glute at the top of the motion. Because the bench absorbs most of the upper‑body load, the focus stays squarely on the working leg, reducing the chance of compensatory lumbar extension.
Why It Targets Your Glutes Effectively
Two biomechanical factors make this move a glute‑builder’s favorite. First, the hip joint starts in a flexed position, which pre‑stretches the gluteus maximus and primes it for a stronger contraction. Second, the bench provides a stable anchor, allowing you to keep a neutral spine and prevent the hamstrings or lower back from stealing the work. The result is a clean, isolated contraction that feels almost like a mind‑muscle connection.
Step‑by‑Step Guide to Master the Move
Follow these cues to execute a safe, effective kickback:
- Set‑up: Position a bench so that it’s parallel to your body. Place one knee and hand on the bench, keeping your spine neutral. The opposite foot stays flat on the floor, hip‑width apart.
- Engage core: Draw your belly button toward your spine, bracing the mid‑section. This stabilizes the torso and protects the lower back.
- Drive the hip: With the working leg, push through the heel, extending the hip until your thigh aligns with your torso. Aim for a slight pause at the top while squeezing the glute hard.
- Control the return: Lower the leg slowly, feeling the stretch in the glute. Avoid letting the knee touch the ground; maintain tension throughout the set.
- Repeat: Complete the desired reps, then switch sides. Typical sets range from 3 × 12–15 per leg, adjusting weight or resistance bands as you progress.
Common Mistakes and How to Fix Them
Even a simple movement can go off‑track. Here are the most frequent errors and quick fixes:
- Rounding the lower back. If you feel tension in the lumbar spine, tighten your core and shorten the range of motion until you can keep the torso flat.
- Using momentum. Swinging the leg reduces glute activation. Slow the tempo to 2‑seconds up, 2‑seconds down, and you’ll notice a deeper burn.
- Letting the knee drift outward. Keep the knee in line with your hip to keep the glute, not the outer hip, doing the work.
- Insufficient hip extension. Aim for full extension—your thigh should be nearly parallel to your torso. A partial range cuts off the most effective portion of the contraction.
Progression Options and Variations
Once the basic kickback feels easy, you can add load or change the angle to keep the muscles guessing:
- Weighted ankle strap: Clip a light plate or kettlebell to the ankle for extra resistance.
- Resistance band: Loop a band around both thighs or anchor it to the bench, increasing tension as you extend.
- Elevated foot: Place the working foot on a low step while the other knee stays on the bench, shifting the hip angle for a slightly different glute emphasis.
- Single‑leg bridge combo: After a set of kickbacks, roll onto your back and perform a glute bridge with the same leg. The transition maximizes metabolic stress.
Putting It Into a Weekly Routine
For balanced development, pair the bench‑supported kickback with other glute‑centric moves such as hip thrusts, Romanian deadlifts, and lateral band walks. A typical split might look like:
- Day 1 – Lower body strength: Squats, hip thrusts, bench‑supported kickbacks (3 × 12 each leg).
- Day 3 – Hypertrophy focus: Romanian deadlifts, split‑stance lunges, weighted kickbacks (4 × 10 each leg).
- Day 5 – Conditioning: Circuit of kettlebell swings, banded glute bridges, and bodyweight kickbacks (30 seconds per exercise, 3 rounds).
Rotating the kickback across multiple sessions ensures consistent glute activation without overtraining. Remember to listen to your body—if you feel tightness, add a mobility drill for the hip flexors before the next workout.
FAQ
Do I need a bench, or can I use a sturdy chair?
A bench offers a flat, stable surface that distributes weight evenly, but a sturdy chair or a low table works fine as long as it can support your hand and knee without wobbling.
How many reps should I aim for when building size?
For hypertrophy, aim for 8–12 reps per leg with a weight that makes the last two reps challenging but doable. Adjust the load as you get stronger.
Can the kickback help with lower‑back pain?
Because the exercise isolates the glutes while keeping the spine neutral, it can actually alleviate lower‑back discomfort by strengthening the posterior chain. Just be sure to maintain core tension throughout.
Is it safe to do this exercise every day?
While the movement itself is low‑impact, muscles still need recovery. Stick to 2–3 sessions per week and pair with rest days or lighter mobility work to avoid overuse.